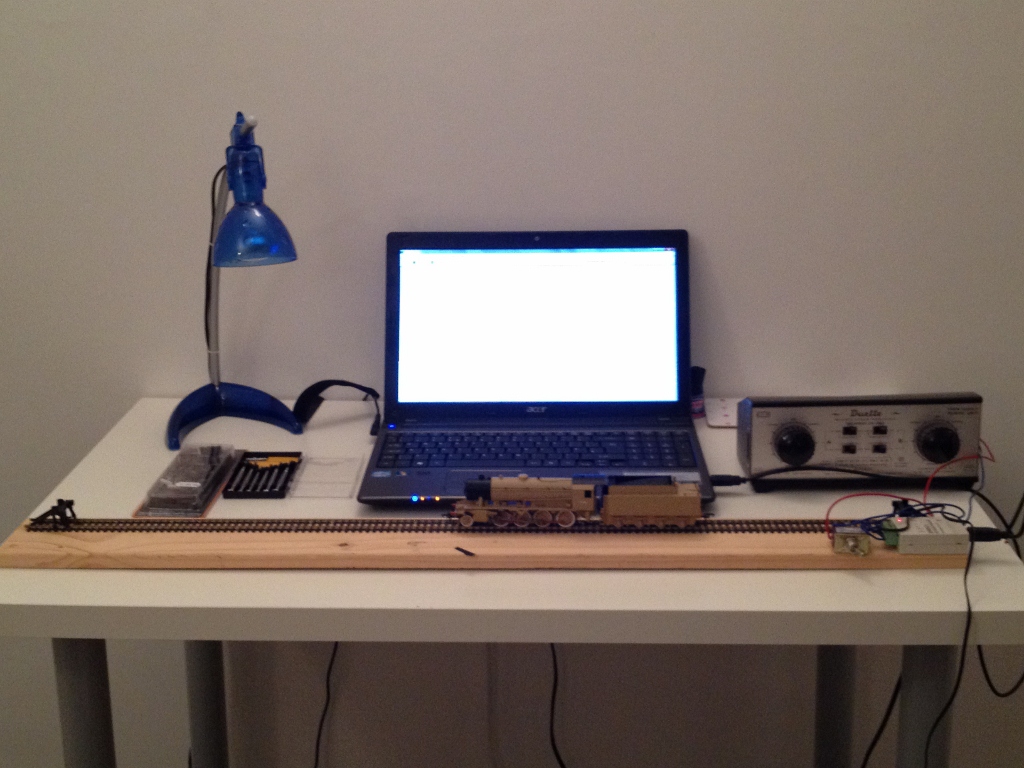
Want to test and program your DCC locomotives away from the Layout? I’ve built a portable programming track to do just that. It is also the ultimate plank layout! All you need is a yard of track, a sprog II to supply the DCC signal, and a laptop with a spare USB to connect it to and provide a host for the programming software.
Step 1: Attach a yard of track to a small plank. I used a 3′ length of 3″x1″ timber that came off a workbenck I took apart some time ago. My track choice for this is Peco Streamline code 100, so it will accept a variety of standards of locomotive wheels. Even though the layout uses code 75 it pays to be ready for anything that might come your way to be tinkered with. I added a pair of buffer stops to the ends of the track just to avoid driving that precious new locomotive off the end and onto the floor.
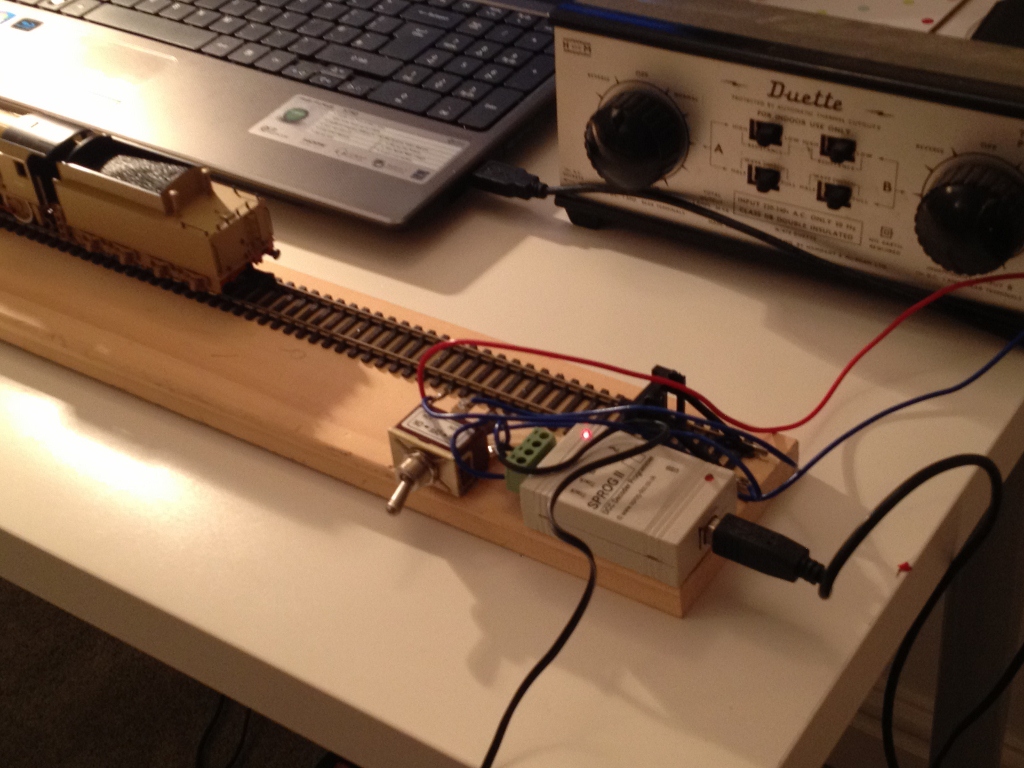
Step 2: Solder a track feed. I attached 2 short cables to one end of the track.
Step 3: Attach the Sprog to the plank: I stuck it down with impact adhesive.
Step 4: Fit a switch to enable DC and DCC to be used interchangeably. Its always useful to be able to test a locomotive works properly on a traditional DC supply before conversion to DCC. I used a double poll double throw (DPDT) toggle switch so that both track feeds are switched and DCC feed is kept completely isolated from the DC supplyThe track feed connects to the two central terminals, a pair of cables lead from one side of the switch to a DC controller (usually my trusty old H&M Duette) a pair from the other side go to the terminal block on the sprog.
Step 5: Fit a power supply to the sprog: The sprog comes without a supply, but one can easily be bought separately. I found I had an old mobile phone charger that delivered the correct output. It was a simple job to cut off the plug on the end, check the polarity of the bared cables with a test meter and then fit these to the two remaining terminals on the sprog’s connecting block.
Step 6: Install DCC software to the PC. Sprog works with JMRI Decoder Pro, which is open source and available free of charge. The software is actively developed and new production versions are made available every 6 months or so. A version will have been supplied on the CD that comes with the Sprog, but it is best to ignore this and download the latest version from the JMRI website. Installation is straightforward, but detailed instructions are available in the decoderpro online manual
Step 7: Install the drivers for Sprog that are supplied on the CD. If you use windows simply put the CD in the drive and attach the Sprog to a USB port. Windows will start to install the new hardware. Winows isn’t supplied with Sprog drivers so opt for a manual installation and point Windows to the CD to find the driver. The Sprog includes a USB to serial adapter, so a second “found new hardware” prompt will display. DO NOT CANCEL THIS, you need to install the serial to USB driver as wll as the Sprog driver .
Step 8: Start Decoder Pro and configure it to talk to the Sprog.From the main Decoderpro menu select Preferences and set up as follows:
Once this is done you will need to save settings and restart Decoder Pro for these to take effect.
I’ll show how to use DecoderPro to program the WD Austerity in the next blog……..


Trackbacks/Pingbacks